Friday, September 28, 2012

Dry water marbling/ DIY nail strips

By now most of you have seen those nail polish strips or stickers. If you haven't, well you must not look at nail polish that often, because they are becoming pretty popular. I think they are great. They have some really cool designs you can put right on your nails, instant manicure. My favorite and the ones that last the longest in my opinion are from Sally Hansen. That being said they are a bit expensive. When I find something I like but maybe not want to pay that much for, I tend to try to make my own. This lead me to water marbling. It's something I've tried a few times before, and failed miserably. O.K.  maybe not miserably, but my attempt certainly did not look like others I've watched on Youtube. In my quest to make my own polish strips, I discovered dry marbling. THIS I can do.

Get yourself a plastic sandwich baggie, or a piece of Saran Wrap. You want it to be flat so if needed tape the corners to the table. 


Next take the colors you want to use and start dotting them on the plastic. Have all your colors open and ready to go. You need to work quickly, but don't worry, you don't have to be Flash Gordon or anything, just don't let the polish dry. Use each color and try to group them in the shape of a fingernail. Make sure you get it wide and long enough for your nails. To be on the safe side make it wider than you need.


Keep alternating your colors till you have a small puddle of polish dots. Take a toothpick, dotter, anything with a point and lightly drag through your puddle. Don't mix too much or you will just have a solid icky color. If you want more of one color add more dots. You will end up with a marbled swirly spot. Make one at a time and do enough for all of your nails. Let dry completely. 


Once dry you can start peeling them off and placing them on your nails. Do one nail at a time and first paint with a clear base coat. While still wet place your strip on your nail and gently smooth into place. It's going to look messy, but don't worry, we can clean it! 

Peel

and press

Let them dry on your nails for a minute or two and simply file off the excess from the tips, just like with the nail strips from the store. Clean up around your fingers with a Q-Tip in some polish remover or however you usually do this when painting your nails. Paint over with a top coat and you're good to go!


As for staying power, my home made strips are comparable to the Sally Hansen ones. You can make all sorts of designs this way and it may be easier than trying to draw on your nails. I will probably do this mainly for marbling looks. 


Thursday, September 27, 2012

Pumpkin tattoo carving

I had planned on doing a post about how I carve pumpkins each year. I still plan on showing you how I usually carve, but I had a request from a friend interested in how pumpkin tattoos work. Wait, what? Pumpkin tattoos you say? No, I didn't get another tattoo, although the thought has crossed my mind.

What I'm talking about is a new product this year from Pumpkin WoW. They are pumpkin carving stencils that adhere to your pumpkin like a temporary tattoo decal. Put them on, cut out the pieces. I was intrigued when I saw these, and lucky me, I won a Family Party Pack of tats. Here is my honest review.

The Family Party Pack has very family friendly patterns to choose from. There are some very simple patterns with just a few pieces to cut out and some that I consider moderate, which I chose to do. I actually wanted to do one of the easiest patterns, but felt that was cheating almost, so I picked one of the harder ones.

The tattoos come individually packed together, not together in a pattern book. This is what it looked like right out of the package.

ARRR Wench, a pumpkin I be needin'! 

The instructions are printed on the back of each pattern and are pretty straightforward and simple. Place a towel or paper towels on a cookie sheet and cover with water. 


Now place your chosen pattern on top of the towel, pattern side up after removing the protective clear plastic on the pattern.  Let soak for about 30 seconds. 

She be sendin me to a watery grave! 

Now place yer pirate, err, place your pattern on your 'kin, pattern side down. 


Here is where it can get tricky. The pattern easily came off and onto the pumpkin, but it also moved very easily. Smaller children might have a problem with this part. I ended up messing up his mouth and there is no way to move the pattern around once it's on. Also, some of the smaller, skinnier edges folded over when I was peeling off the paper and either stayed folded over or torn off when I tried to smooth them out. Gently press the pattern into the lines or grooves of the pumpkin with a wet finger.  Outside of his mouth being messed up it came out pretty good. 


ARRR! Matey! I'm a pirate, tis scurvy that messed up me mouth! 

Let this dry or as per instructions use a hair dryer to dry the transferred pattern. I lightly blotted with a paper towel and it took no time at all to dry. Now you simply cut out the black pieces. 

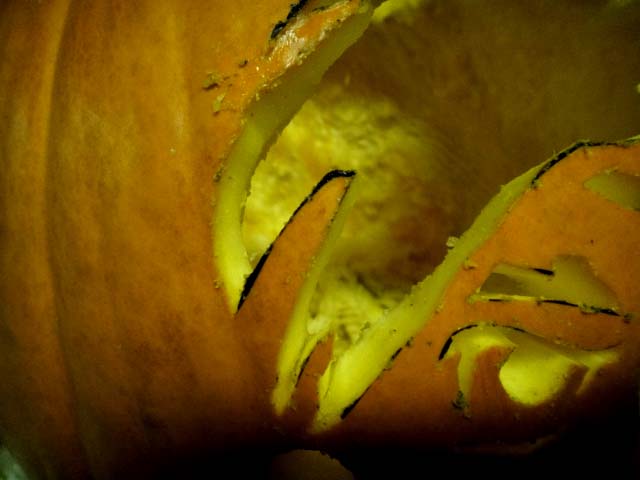
There was no resistance at all cutting through the tattoo, it was like it wasn't even there. I tend to rest my hand on the pumpkin while carving to give me better control. On the places my hand sat against the pattern it felt a little sticky, but it stayed on through the carving. I didn't notice any problem with the edges peeling up or peeling from the pumpkin being wet where I was cutting. After carving there were a few places where you could see the black still on the pumpkin where I didn't quite cut far enough. They were easily removed with a wet paper towel and some light rubbing. 

Like this.

ARRR! Ye wench did a good job swabbin' the deck! 


Again, besides his mouth mess up these tattoos work really great. It certainly saves time transferring patterns to the 'kin. However it is easier to mess up if you slide the pattern while applying to the pumpkin. Also, I like to have a copy of my pattern. These are a one use type of thing unless I want to trace the pattern or copy it. I also like having a copy of the pattern  so that I can refer to the pattern while carving. This comes in handy with some patterns when I'm not quite sure how to carve a certain area. While I could still see the tattoo lightly on the paper after transferring it, it was also wet and I ended up throwing it away right away. Someone also pointed out to me that these patterns can not be re-sized to fit your pumpkin if needed. 

Over all the tattoos are great, but a little pricey. I wouldn't have bought them if I didn't win a pack. For less than the price of one pack I can print out 100's of designs from my favorite pattern site and print as many times as I want. There is a little more work involved with regular stencils, but it's worth the price difference. Pumpkin WoW does have some really great patterns with something for all ages and skill level. I'm pretty sure I will be checking them out more in the future. 

ARRR! Keep ye hands off me treasure, wench! 


Thursday, September 20, 2012

Makeup on a budget

By now, you know I like makeup. I usually like experimenting with dramatic looks with bold colors. It's not what I wear everyday, so it's something different and fun. Every day looks are, well, everyday. So occasionally I get out my blue, hot pink and red eyeshadow and try to create something dramatic. I take a picture and post it on my Facebook page, although I am no makeup artist, I just do it to have fun. I usually list the products I use and have heard a few times from people that they love the colors but can't afford some of the big name makeup brands. Well, I'm here to tell you that you don't have to spend a fortune on makeup, those dramatic NowYouCan'tLeaveTheHouse looks can be yours for under 10 bucks! Here's how.

Buy this.


I found this in Walgreens the other night and loved the bright blue and purple eyeshadow on the cover model. I guess that's Fergie, or suppose to be, I don't really know. She has teamed up with Wet 'n Wild with nail polish and now a makeup kit. The box opens up like a book and has everything you need inside to whore up your eyeball holders. 


Eyeshadow palette with 4 shimmering colors, liquid liner, liner pencil, mascara, shadow brush and an eyebrow brush. All for the low low price of $7.99! It even has instructions on how to look like Fergie, although the finished instructions look does not match the finished look on the cover. I sorta followed the instructions and sorta did my own thing. Here is what I got.


Oh how I WISH I tweezed my eyebrows! They seriously grow all over the place these days. Even if I had never tweezed them they wouldn't be growing that far down. What's up with that? Wandering brows.. I have them. But I digress.. we are here for the makeup. So let's talk about that. 

The eyeshadow is awesome. When I was a teen I had bought Wet n Wild product because they were always .99 cents or lower. Back then they were pretty colors that looked so awesome till you put them on. Sheer isn't the word to describe the colors once on your skin. More like "did I put some on? I thought I did, but I can't see it.. " Maybe if you sat there for 10 minutes applying over and over again you would get some color. Well, that's not the case anymore. Wet n Wild has some nicely pigmented shadows these days. This was done without the use of water or a primer. 

I lined the top lid with the pencil in the kit. I usually use a liquid liner since it flows so easily and my old lady eye lids aren't that tight anymore and the skin just kinda moves along with the pencil instead of the pencil sliding over the skin, unless I pull and stretch my eyelid. The pencil included is black with some glitter. I don't see any glitter but the pencil itself did a pretty good job. 


The mascara worked o.k... it seemed a little bit dry and the applicator wand was "pokey". That's the only way I know how to describe it. It's not something I would buy and use all the time, but it got the job done well enough. The liquid liner was great, although I've always had a hard time putting liquid liner under my bottom lashes. It was a very pretty color and nicely pigmented. 


The only thing I added to this look not included in the box was foundation and my eyebrow pencil. Oh, and a nude colored lip gloss. Usually when I do such heavy eyeshadow I don't leave the house unless I'm going out at night to a club or something. However, yesterday I went shopping like this. Every where I went I felt like my eyes were actually heavy. I figured people would think I was just one of those crazy old ladies that wore far too much eye makeup. 


I'm going to go tweeze my eyebrows. This should take awhile. 


Monday, September 3, 2012

Día de los Muertos

Probably the coolest holiday around is Dia de los Muertos or Day of the Dead. At least it is for someone like me. I know a few people who would think the whole thing is weird and maybe evil. In reality it is a time where family and friends come together to pray for and remember family members who have passed on. In Mexico it is a national holiday and if you were born there it would be part of your culture and you wouldn't think it was weird at all. While I could make a lengthy post about the holiday and traditions I just want to get to one part in particular. The Sugar Skull.

I've always liked these skulls. I mean, come on, it's a skull, it's already awesome. We all have one and carry it around with us everywhere we go. We already decorate it with all types of colors, jewels and hair. The Sugar Skull is one of the main symbols seen during the Day of the Dead festivities. The reason they are called sugar skulls is they were originally made from clay molded sugar. The name of a departed soul would be placed on the forehead of the skull. It would then be placed on the grave of that person with hopes the soul would return on the Day of the Dead. These skulls are often decorated with flowers, sequins and other symbols.

Which brings me to this guy. 


Michaels Craft store was selling this lovely fella. All I knew was I had to have him. He is made out of plaster or pottery clay, I'm really not  exactly sure what it is. If you have ever painted ceramics it's just like what ceramics are like before being fired for the first time in a kiln. He is rather soft, chips easily and leaves white powder all over everything. Still, I had to have him. 

My first thought was SUGAR SKULL, but I also like the tattoo style painting I've seen done on similar skulls. I think what I did was a combination of the two. He isn't really in the traditional shape of a sugar sull, but I figured that would be o.k. 

I started out first drawing my designs on with pencil. While it erased very easily if I pressed too hard I actually ended up carving the lines into him with the pencil. 


After I was satisfied with my sketching I went ahead and traced all my lines with a black sharpie. This worked alright, but the dust from the plaster kept building up on my marker and I had to wipe it off several times. 


Next I simply painted what I drew. I used acrylic paint, repainted my black lines so they were crisp and then covered the entire thing in several coats of Mod Podge. The Mod Podge helped to not only make him nice and shiny but sealed the plaster so it's not dusting all over. I also painted the inside black and podge it. He has a place cut out on the bottom where you can add a cord with a light. While he looks kinda cool lit up I think I will display him as is. A colored bulb or color changing light would probably look cool in him.

The finished product. All colorful and flowery.  


POST UPDATE:

I ended up painting the teeth and it looks even cooler now! I thought about re-doing my above collage picture, but instead I will just post a picture with the painted teeth. I'm pretty sure I'm going to keep him on display always, not just for Halloween. 

Do I have something in my teeth?


Monday, August 27, 2012

Bat globe!

I'd like to collect snow globes. There is just something magical in little scenes trapped beneath water with swirling "snow" that I love. The only reason I don't have some massive collection is because 1. I hate clutter, and 2. I hate dusting.  There is a 3rd. reason, but I don't want to offend anyone by mentioning being an old lady with an insane number of snow globes and a story to go with each one. Since I can only think of one other globe I have I figured it was safe to make one and bring my collection number up to two. My other store bought globe is also a Halloween themed globe, so I only have to dust it a few times while it sits out for the season.

This time of year the craft stores are filled with Halloween and Christmas items. It becomes Hallomas in these stores. This is a good thing in this case because one of the items I made this project with is a Christmas craft item. The globe itself.


I bought this at Michaels. It's pretty basic and made of plastic. There are places online you can find empty globes that come in different sizes and are made of glass. One day I plan on making a bigger, better globe and may buy one of those, but for now this is fine. You can also use clean baby food jars, canning jars, ect. These come with instructions inside on how to make your own globe, but I didn't really follow them. I probably should have, but I just tossed the instructions to the side and read them after I finished. Yeah, smart. 

Since a globe with just swirling "snow" would not be that interesting to look at you need to buy something that is interesting to look at. The Halloween village items are perfect for this. Keep in mind you don't have a ton of room, so make sure what you pick is going to fit inside. I chose this gravestone with ghost. 

Ahhh... tomb sweet tomb. 

You will also need the following.
  • Waterproof glue (I used LIQUID FUSION!, say it in your head with a booming voice. Sounds cool, right?)
  • Glitter for the "snow" or confetti
  • Glycerine


I decided I wanted a spooky tree behind my ghosty but all the trees in the village items were too large, so I had to improvise. I bought this out of the floral section and just cut some of the top pieces off to a good length. 


I took these pieces and using my waterproof glue glued my ghost and tree pieces to the base of the globe. I used quite a bit of glue on the tree pieces to make sure they stayed where they should. 


If you are impatient like me, you should at least let this dry over night. 24 hours would be best though. This is how it will look in the globe. 


Make sure that it will fit into your globe before doing anything else. I did have to trim my tree tops a bit more. 

For the "snow" I decided to use black glitter and some bat confetti. I found this multi colored bat confetti in Hobby Lobby for .99 cents. Silver, black and purple bats. 


Pour a little bit of glitter and confetti or whatever you want to float around in your globe. If you are using glitter make sure it's a bit larger pieces and not the ultra fine stuff or it's just going to float on top of your water. 


Now fill with distilled water and 1/2 tsp. of glycerin. I really don't know what the glycerin is for but I've read a few places that say you need it. I've also read some people use baby oil, but I'm not sure about that. Glycerin can be found in craft stores in the soap making supplies. Do not over fill your globe with water. Remember when you put the bottom on it's going to raise the water level. Make sure you are over the sink when putting it together or at least have a towel handy. ( Go ahead, ask me how I know.. wait, don't ask.) You can add or subtract water while putting the base on. 

Lastly I took some Halloween themed ribbon and glued it around the base to hide the plastic screw on bottom. If you wanted a more substantial base or something fancier you could put this on top of a pillar candle holder. 

Pirates too! 

It's really impossible to take a picture of the glitter and bats swirling around in my underwater grave. At least, it is with the camera I was using. I wasn't going to get all technical and drag out the Nikon and try to snap the fastest possible pic. Mainly because I still haven't learned how to set the Nikon to do fancy things like that. So I used my little point and "hopetoGodyougotadecentpic" camera. I still probably took about 50 pictures and never did get the bats floating around, although I assure you they do. 

You can barely see one stupid bat on the bottom... *sigh*

Anyway, that's my Halloween bat globe, or lack of bats globe. (I swear, every time I typed GLOBE in this post I accidentally typed GLOVE. So if you see the word GLOVE, it's suppose to be GLOBE! It's not a snow glove or bat glove.. )


Thursday, August 9, 2012

Here comes Spiderkin!

Ahhh, fall is coming. Really, it's on it's way. It's just trying to claw it's way through the heat and humidity of the summer. Stores are starting to stock their Halloween goodies and in many cases, Christmas. But we are here for the Halloween! I have a few crafty idea's in mind for the spooky season, this is my first. I wont do a step by step picture tutorial because it's pretty straight forward.


I picked up a foam craft pumpkin from Michaels craft stores. You can find these in just about every craft store but they are usually different brands. I like the Michaels ones. I chose to do this on a white pumpkin but it would look great on any of the offered colors. Places like Hobby Lobby offer colors like neon green and purple, however I've also seen a paint peel issue on their 'kins. The one I chose is a medium sized 'kin. They have both larger and smaller.

I started by lightly drawing a spiderweb on the pumpkin with a pencil. I did not measure the lines or spaces between them, I just eyeballed it. I drew the vertical  lines in the natural lines of the pumpkin and brought them about half way down. Then I simply connected them with 3 arches.

I used 6mm flat silver backed rhinestones and glued them on the lines I drew. Really nothing special in doing this. I did use around 430 of the little stones though so make sure you have plenty! Also using curved tweezers to pick up the stones and place them on the lines was much easier than picking them up with my fingers and getting glue all over myself. Just don't overload with the glue because you don't want your rhinestones sliding down the pumpkin. After that I glued a glittery spider in the web. I bought him at Michaels also. He actually had a clip on him but I took that off.  I did have to glue down each one of his feet. You could also spray paint a your spider with silver paint which would look great with the silver of the webbing.

It also works without a spider and looks just as good.


Friday, July 20, 2012

You can't win friends with salad!

If salad became the only food there was to eat, I would be content. I love salads, minus potato salad. I'm an Idaho girl who hates potato salad. O.K. maybe I don't hate it, but I don't really care for it much. Most other salads rule. Here is my favorite.

This is my easy Oriental Chicken Salad. The original recipe I had for this has been lost through the years. I am sitting on my laptop typing this, yet I am still too lazy to use Google to see if I can find something similar. Besides, that would cancel out the point of this blog. I'm showing you how I make it, not how it's suppose to be made. I have no idea on the calories involved or nutritional information. Just remember, even though it's a salad doesn't mean it's going to be super healthy. :)

You will need:


  • 2 lbs. of cole slaw or chopped cabbage
  • 3-4 small to medium sized chicken breasts or breaded chicken pieces
  • 4 packages of chicken flavored Ramen Noodle Soup
  • 1 c. vegtable oil
  • 1/2 c. sugar
  • 1/2 c. rice wine vinegar
  • 1/4 c. roasted sesame seeds
  • 1/4 c. sliced almonds 
I actually left out the sesame seeds this time because I didn't have any, and I left out the almonds because I don't like them in salad, but for those that like almonds in stuff they would probably be good. 

I probably don't have to say this but... cook your chicken as directed on the package. Bake it, fry it, deep fry it,  pan fry it, just don't use it raw. I used some breaded chicken fingers because they are good. While they are baking or whatever you are going to crush up the Ramen noodles in a large bowl. 


All crushed up.  

Save the little flavor packets that come in the noodle packages, you will use them later. Add your crushed up mix to your cole slaw or chopped cabbage. I prefer the bags of cole slaw because it is so much easier to just cut them open and dump them in a bowl. Remember, I'm too lazy to Google something, chopping cabbage is even harder. 


When your chicken is done cooking cut it up into little bite sized pieces and add to the mix. I used 3 medium size breaded chicken fingers but you can use more or less depending on what you like.


Mix everything together well. If you have the sesame seeds and almonds throw them in the mix or sprinkle them on top of each serving if others don't like nuts and seeds. The seeds are good on it, I just didn't have any and I didn't want to wait to make the salad. Again,  I can't Google, I'm certainly not going to the grocery store. 

Now we are going to make the dressing. 


Heat 1/2 c. rice vinegar in a small sauce pan, I let mine come to a boil. Add 1/2 c. sugar and stir till sugar is dissolved. Once sugar is dissolved remove from heat and add 1 c. vegetable oil and your flavor packets from the Ramen noodles. Still everything together and pour over the salad. Stir the whole sha-bang till everything is nicely coated with the dressing mixture and enjoy!! It's really good if you eat it right away, the noodles are very crisp and it's not bad at all with warm dressing. Try a bowl right away then let the rest sit in the fridge. It's really good when everything absorbs the dressing and is my favorite that way. 


Bon Appétit!