Showing posts with label Christmas. Show all posts

Sunday, September 14, 2014

DIY personalized Christmas Snow Globe Ornaments.

It's coming. It will be here before you know it. Yes, I'm talking about Christmas!! I don't like to push Halloween out of the limelight, but when it comes to crafting it sometimes takes awhile, especially if you are making a lot of something, so I will give a pass out to go ahead and think about that big end of the year holiday. However, you will go back to thinking of Halloween right after.

I didn't really think of blogging a tutorial on this, so I don't have pictures of everything, and as usual my pictures are not professional looking shots like I usually see on blogs. I'm just a regular chick with a camera and glue all over the place.

Let's get started.

Materials Needed:


  • Clear glass or plastic ornaments. These can be found in just about any craft store. I found unbreakable ones at Hobby Lobby that are sold single. 
  • Red or green heavy paper. Use something like card stock. If you use a glitter paper make sure it's glittery or at least colored on both sides. 
  • Glue
  • Fake snow/glitter/or whatever you want to place inside your ornament.
  • Scissors or an X-acto knife or if you have some sort of paper cutting machine things will be even easier! 
O.k. so your balls should look like these. Just clear ornaments. You can choose either glass or plastic and they usually come in a variety of sizes. I picked up the larger ones for this project.


This is the hardest part of this project, making your names. If you have a fancy paper cutting machine like a Silhouette you are in luck. If you don't have one see if someone you know does. I've never used one but the more I do paper cutting, the more I wish I had one. If you don't have a machine you can use scissors or an X-acto Knife or other crafting knife. This is my preferred cutting method, but it's not easy. 

You also have a choice in the how you design your names. I use a free program called Inkscape. (Google it). You can use Paint or Photoshop or a quick Google search will probably give you many more free programs to use that design fonts. If you simply can't master any of these you can draw out your names.  You do want to make sure your letters are all touching each other because if not they are just going to fall apart. Remember when choosing your paper you will be able to see the front and back of the names so each side should look good. You will need to measure the ball you choose to see how long the name tag should be and how wide of an opening the ball has. You need to be able to fit the name inside. You will need a tab on the top and a tab that hangs down into the ball where the name will start. Confused yet? Yeah, so am I. This is what you are looking for.

The box is to show the boundaries of the letters so they fit inside the mouth of the ball. Everything in black is what you are going to cut out except for the thin box the name is in. To cut these out you can use that aforementioned machine, scissors, which I think would be a nightmare, or a craft knife. A craft knife will be easier than scissors. Just print your names on the back of the paper you want to use, place on a cutting mat and follow the lines with your knife. More confused? Youtube has some good tutorials for paper cutting with an X-acto blade or similar. 

After you cut them out you should have a ton of name tags. 

I actually cut these in red and in green and glued them together so they are red on one side, green on the other. I do not recommend doing that. 

Now you are going to take your names and glue them to the inside of the tops of the ornaments. Bend the top tab and glue into the middle of the underside of the "lid" of the ornament. Make sure these are dry before putting them back inside the balls. I rushed and found out the hard way the glue needs to be dry! 

You should end up with a name hanging down off the "lid". This is why you need to measure your tags to make sure the name hangs down far enough into the ball that it isn't blocked out by the top around the lip of the ornament. You also don't want them too long so that you can put other stuff in the bottom of the ball. 


If you made it through all that, the rest is a breeze! You can fill your ornaments with anything really. I was going for a snow globe look so I chose some fake, glittery "snow". One thing if you are going to use snow like this or glitter remember that it will stick to the sides of the ornament from static. If you don't want that to happen you might try the fake snow that is more like tiny balls instead of the light feathery stuff I got. I like how it looks sticking to the sides though, so I'm o.k. with it. It makes it look kind of frosty. I also added some shiny "Merry Christmas", Santa's, "HO HO HO's", stars, Christmas Trees, ect. Just make sure what you fill it with can fit in the opening if the ornament and go crazy!!


Once filled you are going to carefully slide your name into the ornament and snap the "lid" back on. I tied ribbon on the hook part to hang them or you can get some of the fancy hooks they sell at craft stores for hanging or even attach a cute charm. Whatever you'd like to do. 


O.K.. now get back to HALLOWEEN!! 


Saturday, December 1, 2012

Ornament greeting

I actually made this last year, but ended up breaking a few of the ornaments this year when it fell shortly after hanging it up. Thankfully it's easy to fix and while doing so I took a few pictures and decided to show everyone how I made it.

Supplies you will need are:


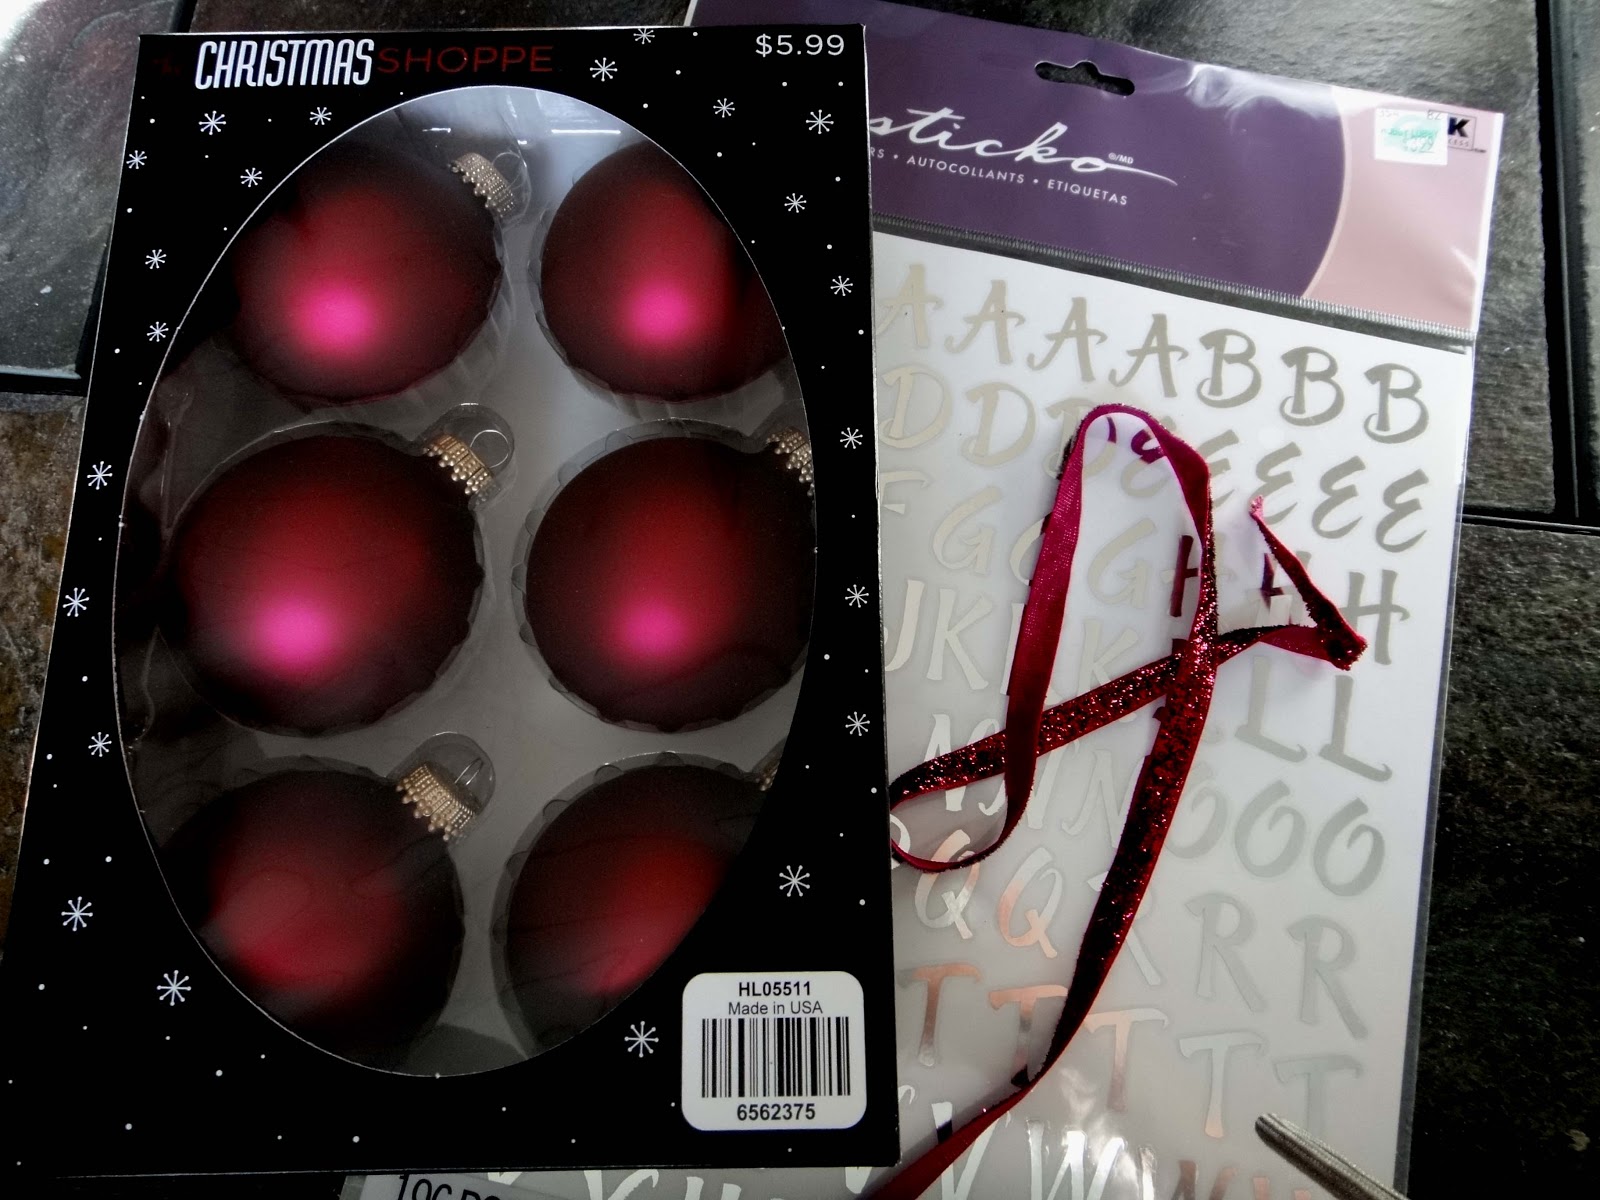
  • Christmas ball ornaments in the color of your choice. Most of my tree is red and silver so I went with red satin finished ornaments. Choose your favorite color or mix and match. You will need 14 balls. 
  • Alphabet stickers. I went with silver for the red and silver theme. Just pick a color that will stand out on your ornaments. 
  • Ribbon. Again, choose a coordinating color. I didn't measure the length of the ribbon I used. You will need enough for all 14 ornaments to fit on and more to hang with. 
  • Scissors


The rest is very easy. Take your stickers and place one letter on each ornament, trying to center it as well as possible. You can spell out whatever you want, just make sure you have enough of each letter sticker before starting. I used all the capitol letters on mine. 


Once all your letters are on you're going to thread your ribbon through the hook on the top of the ornament. I left the ribbon on the spool while doing this to make sure I used enough ribbon. Once all the ornaments are on, spread them out across the table and space them out down the length of the ribbon. When you are satisfied cut the end of the ribbon from the spool and tie each end in a knot to keep the ornaments from sliding off. 


I kept mine loose on the ribbon but you could tie a knot in each one at the hook to keep them in place. I know I may use mine in other places and wanted to be able to make it longer if needed or not as spaced out, depending on where I hang it. 

This would look fabulous hanging from a mantle, however my fireplace does not have one, so I hang it from my bookshelves. A mantle is on the list of must haves in the next house we buy. 


Professional pictures look SO much better! 


Tree update!

I just have to say, if you are looking for ornaments for your Christmas Tree, check out Hobby Lobby. They have a HUGE selection of the unique ornaments I love so much and also the traditional ball ornaments in all colors.

I happen to stop by the other day looking for some chalk markers and noticed the 50% off Christmas signs. Now, how can I resist that! I wanted to get some black ornaments for the tree. Yes, black. I also picked up some cool black and red ribbon, and while I am super tempted I am not going to take down the ribbon on the tree and add the new stuff. I am extremely tempted though, and it still might happen.

Now quit reading and go to Hobby Lobby before everything is sold out.